

How To Do Checkerboard In Photoshop
After yous've cutting out an paradigm or created a graphic in Photoshop, you're left with a checkered background that seems to be impossible to remove. Since you probably wanted a transparent background subsequently all your selections and masking, a checkered background merely isn't going to cut it. Well, every bit yous'll soon learn, a checkered background isn't as much of a problem as yous might think.
A checkered background in Photoshop represents transparency in your project. Since the checked background is already transparent, there is nada to be removed. To maintain this transparency for export, save your image every bit a PNG by going to File > Save A Re-create and gear up the format to PNG.
Throughout this mail, you'll learn more nearly what this checky background means, also equally ways to customize its await. If you're in a situation where the checked background is fastened to your prototype layer, I'll share an easy manner to remove it from your epitome for truthful transparency.
Let's go started!
How To Remove A Checkered Background In Photoshop
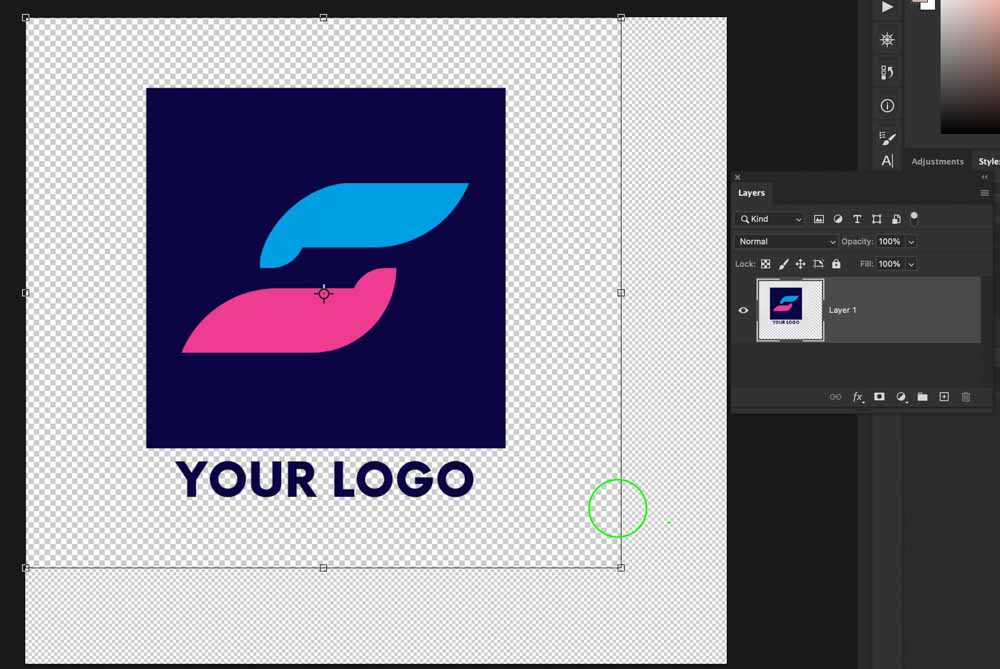
In the example below, I have a graphic that I have removed the white background from. Therefore I am left with a checkered background on my canvass.

From the Photoshop workspace, it appears as if the checkered background is a part of my image, but it's non visible in the layers console. Luckily, this isn't the example. Instead, these checkered backgrounds indicate transparency since Photoshop can't represent "invisible" in any other way.
Although it would be absurd if you could see right through your computer after cut out a photograph…
With that said, it'southward important to note that these checkered backgrounds practise not stay on your image when yous consign. Instead, you have to export to a file blazon that preserves transparency to proceed a transparent background.
In most cases, the all-time file type to export to is PNG. This is because it preserves transparency and is compatible with every application y'all may work in.
To export a file to PNG, get to File > Salvage A Copy.

Then set up the format to PNG and give your file a name.

Lastly, click Save to export your photo with a transparent background. Since the checkerboard in Photoshop only represented transparency, later on export, your image will have a truly transparent groundwork.
If you lot consign to a different file type, such as JPEG, the transparent groundwork in the Photoshop document will plough to white. This may not seem like an upshot at showtime, but you'll have a white background attached when you attempt to use that epitome in another project.

So if yous want a transparent background subsequently exporting, make sure your file format is set up to PNG!
How To Remove A Checkered Background Attached To A Photograph
In some cases, you may have received an paradigm or graphic download from someone, but at that place's a checkerboard groundwork when you import the image.
In the instance beneath, y'all can see how the checkerboard surround the graphic is unlike from that of the "transparent" checkerboard in Photoshop.
This can happen when your file has been saved equally a screenshot since this will capture both the prototype and the background in the aforementioned screenshot. Another reason is that the checky background was added for case purposes for an online store to give you lot an idea of what the asset looks like.
Luckily this tin easily be fixed with a simple automatic groundwork removal tool in Photoshop.
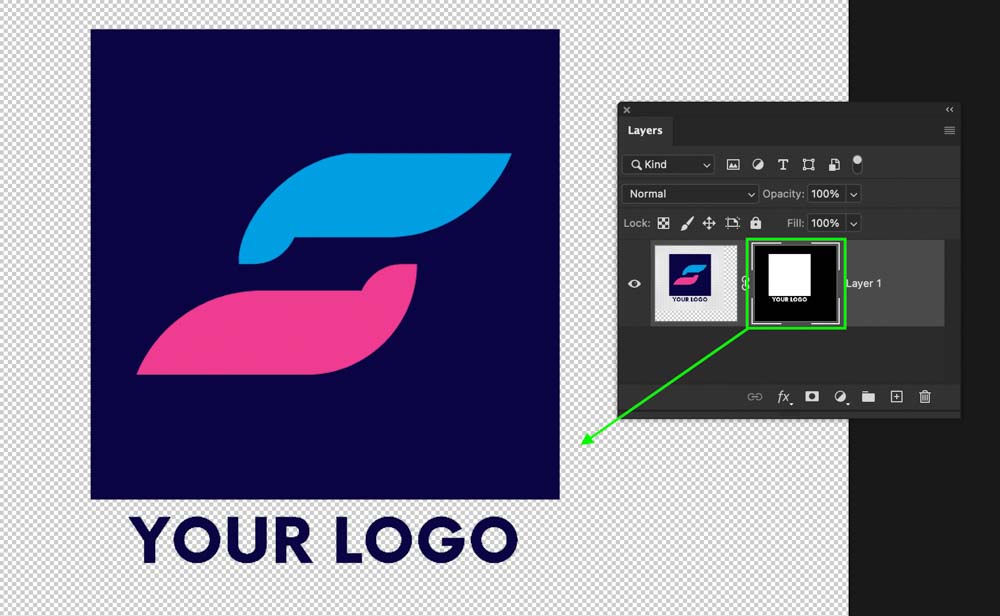
With your epitome layer selected and unlocked, open the properties panel by going to Window > Properties.

Scrolling to the bottom of the properties option, look for the "Remove Background" push within the quick actions. This push will automatically select your subject and remove the background via a layer mask. Click on information technology to begin the background removing process.

Photoshop will work its magic and remove the checkered background from your photo. In the Layers Console, you tin can see the layer mask added to remove the background non-destructively.
Now yous're left with the actual checky groundwork that represents transparency in Photoshop. Using the export method you learned in the previous section, you tin save your image with a transparent groundwork past setting the format to PNG!
If yous have trouble cutting out your paradigm with this method, try these five best alternate methods.
How To Change The Checky Background In Photoshop
You tin change the look of a transparent checkered background in Photoshop by going to Photoshop > Preferences > Transparency and Gamut. In this window are transparency settings to alter the size of your checkerboard, remove it birthday, or change the color of the checkerboard.
Let's break each of the setting options down to give yous a ameliorate agreement of your options.
To open up the transparency settings panel, go to Photoshop > Preferences > Transparency And Gamut.

In the window that appears, you want to focus on the Transparency Settings options. Here y'all can accommodate:
- Grid size of your checkerboard
- Choose a preset filigree color for the checkerboard.
- Create a custom color for your checkerboard.

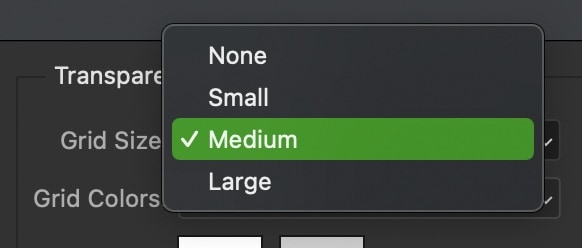
Grid Size:
This setting allows you to change the size of each box in your checkerboard. I like to prepare this to "Medium" to see the grids however, but they aren't too distracting.
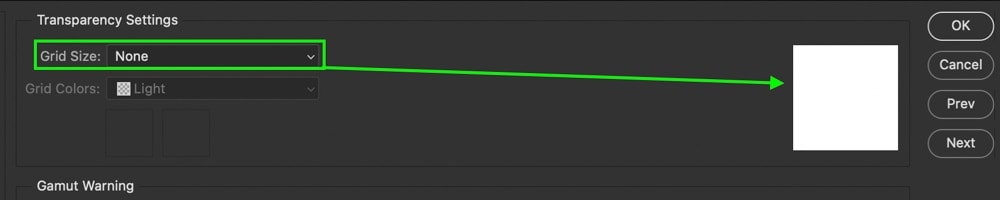
Ane option to notation is the "None" setting, which will completely remove the checkerboard grid and add together a white background. This tin can make things slightly confusing as you lot won't tell the difference betwixt a white background and a transparent ane with this setting active.
To get an idea of the different looks of each size, the preview box will show everything you need to know!
Grid Colors:
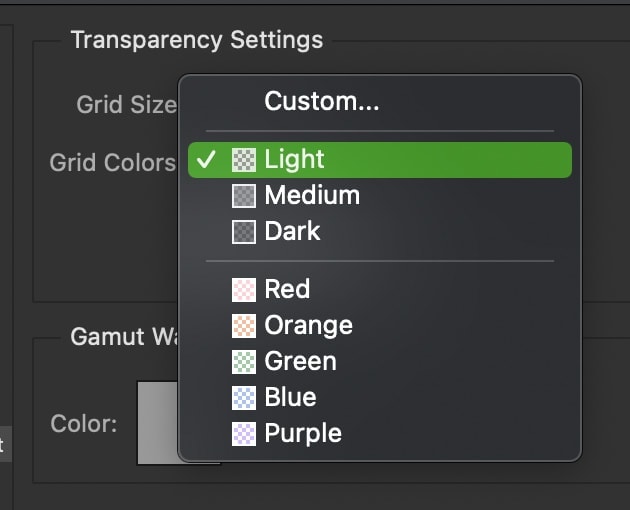
Hither you can spice the await of your checkerboard by adding colors or concealment it. Clicking on the menu, there are a variety of preset options bachelor to cull from. Simply click on the setting you wish to use in your workspace.
Custom Filigree Colors:
Below the previous two options are colored boxes that control the color of your checkerboard. Since there are two colors in the checkerboard, there are 2 colour swatches that y'all tin change every bit you wish.

By clicking on either of these swatches, a color picker will appear to select a new color. Once a color is selected, click OK to apply it to your checkerboard.
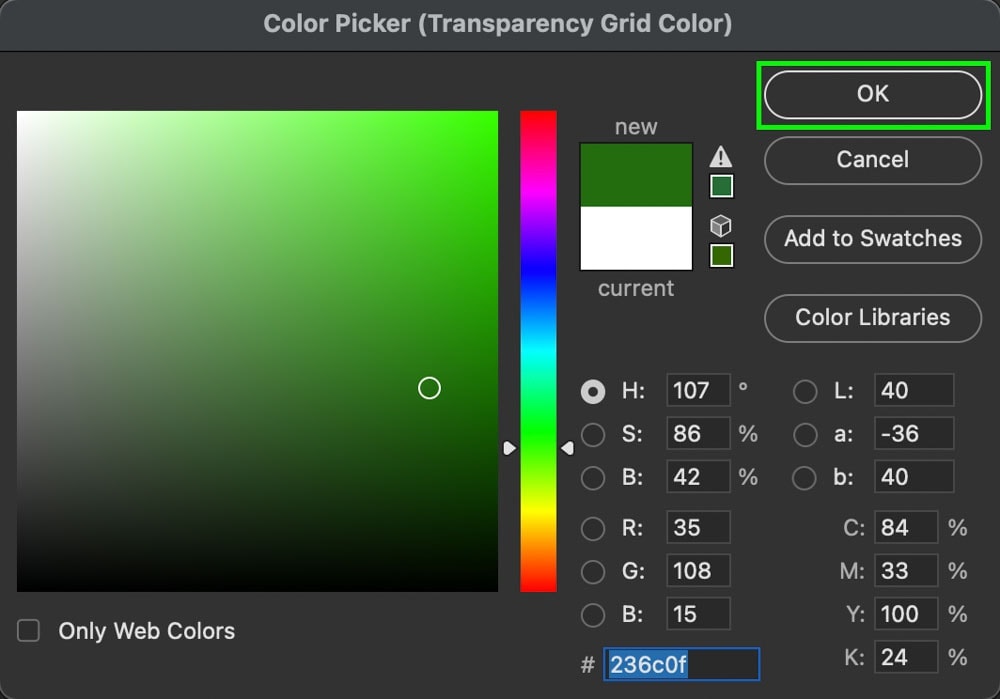
Over again, y'all can employ the preview box to come across how your checkerboard volition plough out.

Then now you know that a checkered background in Photoshop isn't necessarily a problem. That's because information technology represents transparency! To maintain this transparency on export, saving your files equally a PNG will ensure there'due south no checkered background leftover. If you're in a situation where a checky groundwork is actually fastened to your prototype, and then the remove background button is your reply.
Happy Editing!
Brendan 🙂

How To Do Checkerboard In Photoshop,
Source: https://www.bwillcreative.com/how-to-remove-a-checkered-background-in-photoshop/
Posted by: porterpaliptim.blogspot.com

0 Response to "How To Do Checkerboard In Photoshop"
Post a Comment